Deploy PyTorch Model on AWS SageMaker: For Beginners
Contents
This is a tutorial for beginners trying to deploy their PyTorch models online and build a model inference service. If you have trained a PyTorch model, BERT for example, and you are trying to develop an application out of it, then this tutorial is for you.

AWS SageMaker is a machine learning platform for data scientists, machine learning engineers and MLOps engineers, where they can prepare, build, train and deploy machine learning models easily. If you are an AWS free tier user, you will be able to start free trial of SageMaker for 2 months.
But think twice before deciding on SageMaker. There are many other options with lower cost for model deployment. As long as your model doesn’t require huge RAM like deep learning models, you can deploy your model on any cloud computing service like EC2 with Flask API easily.
Prepare the Environment
First, let us sign in to the console as a root user. We will use SageMaker studio, which is like a Jupyter Lab for the whole process of deployment. For the first time, you may need to create an execution role for SageMaker to access some of your S3 buckets.
S3 Buckets
It is recommended to store your data and model in S3. If you have no previously created buckets or would like to use a new one for SageMaker, please turn to S3 console and create a new bucket. You can keep all the settings default when creating a new bucket.
Then it will take minutes for SageMaker to initialize the domain. After that, we can launch the studio and enter the jupyter lab.
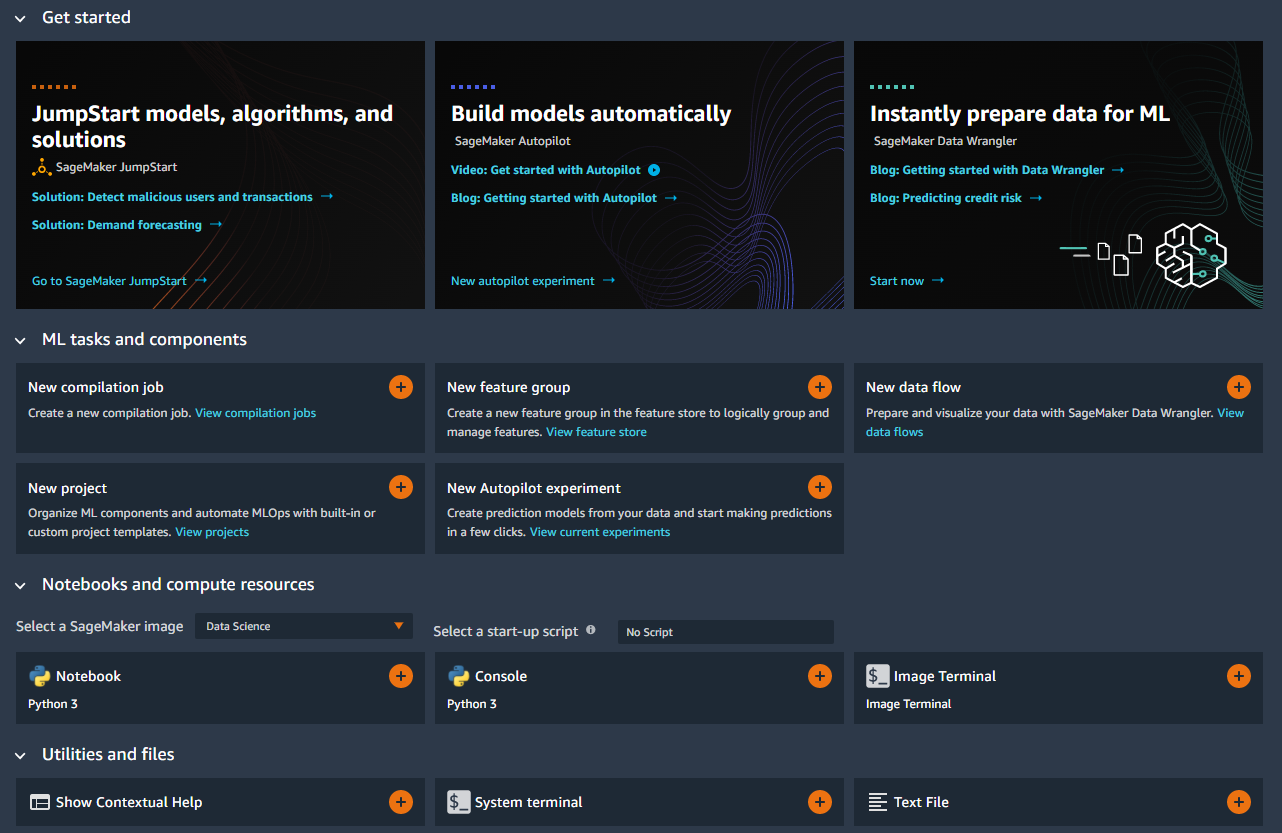
It is time to create a notebook and select the image and instance to run the notebook.
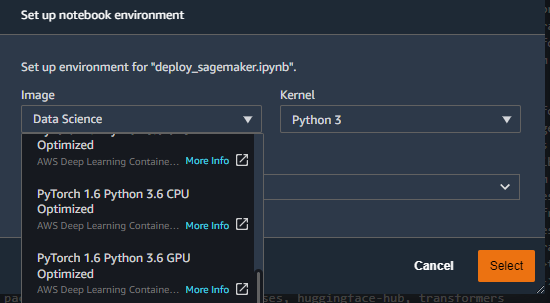
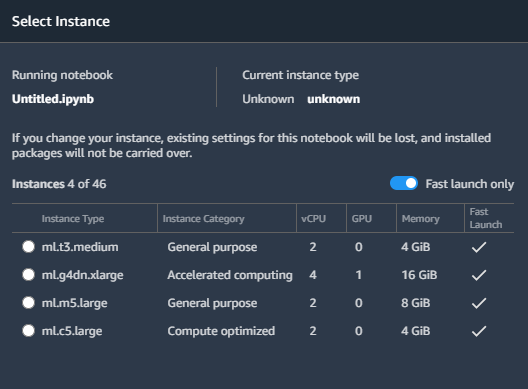
You can select any image compatible with the version of PyTorch and Python that you chose during training. Here I would go with the PyTorch 1.6, Python 3.6 and CPU-based image. Then, choose an instance which is capable of loading your entire model. From my experience, the 4GB instance is sufficient for BERT-base model.
Next, we can install all the packages in notebook with the command
|
|
Alternatively, if you have a requirements.txt which contains all the required packages, you can upload it to Jupyter Lab and run the command
|
|
That’s all about setting up the environment in SageMaker.
Prepare the Model and Inference Scripts
This step can be done completely on your PC or on the SageMaker Notebook.
After training your PyTorch model, you probably have stored your state_dict in a pth file. Rename the file to model.pth.
The next part may be the most time consuming. You will need to implement a script named inference.py which tells the SageMaker how to load your model, how to parse input data and how to make predictions. Here is an example from official documentation.
You will need to define the following functions:
- model_fn: initialize your model object and load your checkpoint
- input_fn: parse input data from your HTTP request
- predict_fn: feed the input to model and get the predictions
- output_fn: convert the predictions to json
For model_fn, it is called only once when the inference server gets started. It should look like:
|
|
Here the BertClassifier is a custom nn.Module class defined myself. Don’t forget to include such classes and import any related packages in your inference.py.
The implementation of input_fn basically depends on how you encode your data. Take BERT for example. If you decide to send raw text to the SageMaker for inference, you will need to implement the whole preprocessing pipeline including tokenizing, padding in this function. However, if you do the feature preprocessing before sending HTTP request, you will only need to convert the json or string to tensors.
|
|
The returned value of input_fn and model_fn will be directly fed into the predict_fn. The predict_fn is quite simple. Almost the same as what we did during training:
|
|
The output_fn converts the output tensor back to json or other content type.
|
|
After finishing the script, we move the script into a folder named code along with a requirements.txt listing all dependencies. Then we can pack the code/ folder and the model.pth into a tar.gz file.
|
|
Then we can upload this file to SageMaker studio or S3 bucket.
Deploying and Testing
Now in the notebook, we create a SageMaker PyTorchModel object to load the model and the script.
|
|
And then deploy the model with one single line of code.
|
|
As soon as this is done, we can try to invoke the SageMaker endpoint within the notebook:
|
|
If this returns expected results, then congratulations, you succeeded in deploying your model on SageMaker. If not, we may need to find the error messages and fix some bugs.
All the logs during deployment and inference can be found in AWS CloudWatch.
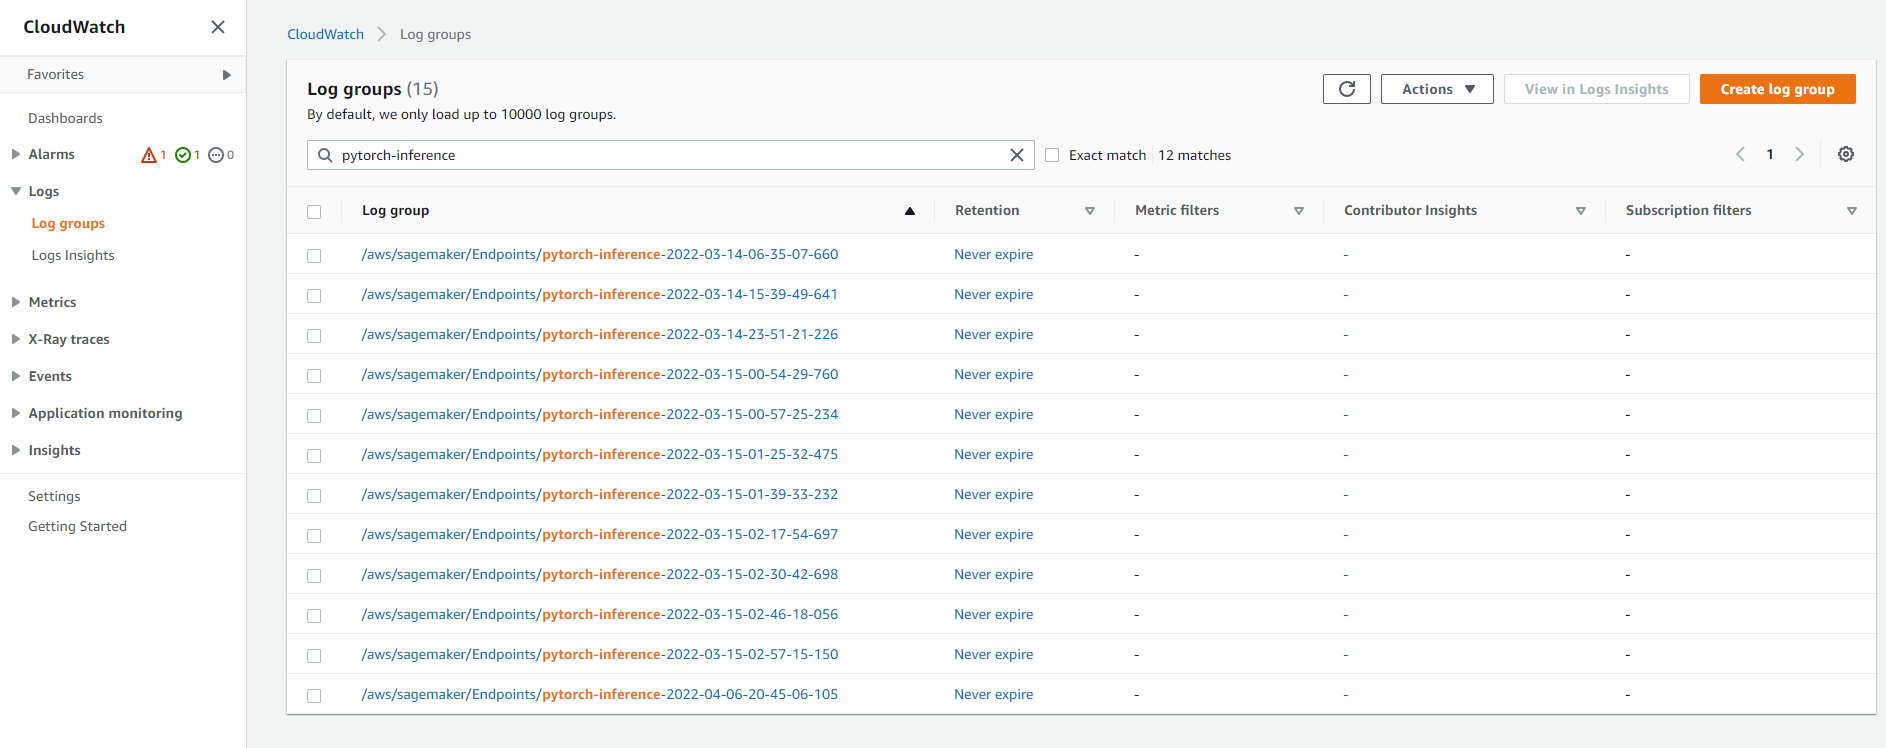
Click the log group corresponding to your endpoint name. Remember you got the endpoint_name by predictor.endpoint_name in the last code block.
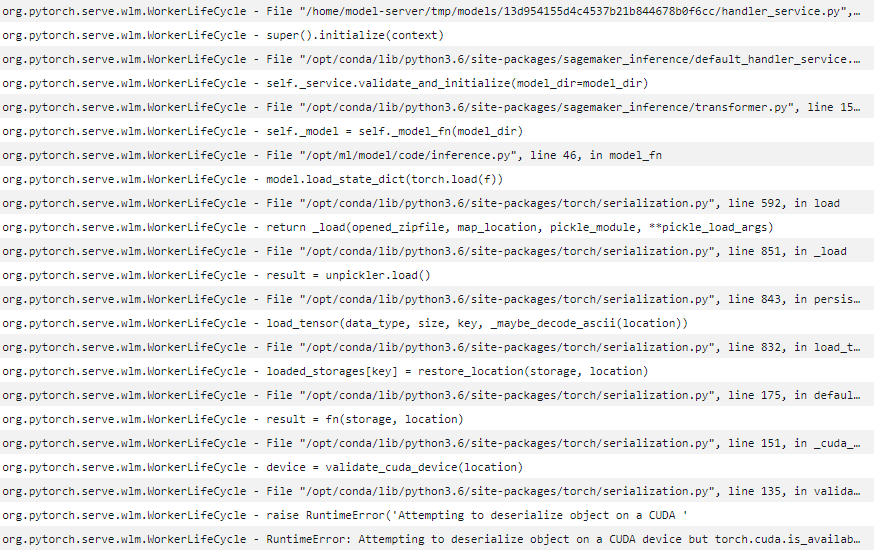
You can see clearly from the logs that I made a mistake when I loaded the state dict from the model.pth, which is because this checkpoint is saved from a model on torch.device('cuda') while loaded on torch.device('cpu'). It can be fixed by adding map_location to the torch.load function.
After fixing the code, we need to re-pack the tar.gz file and re-deploy the PyTorchModel. We repeat this util the response gives correct predictions. (If anyone knows how to make this debugging process easier, please let me know)
Finally, it is recommended to store your tarball in S3 buckets instead of leaving it in SageMaker Studio.
|
|
Create a REST API - Lambda
Now we can use our model to make predictions by calling the SageMaker endpoint on AWS. But what if we would like to call our model from outside AWS? It is a good practice to encapsulate our endpoint with a REST API, which can be requested anywhere.
Here we are going to build the API with the AWS Lambda and AWS API Gateway. I will follow the AWS Documentation, which includes the use of Lambda. It is said that API Gateway can directly forward the HTTP requests to SageMaker endpoint without the Lambda service. You can try it if interested.

The API Gateway receives HTTP requests from external apps and forwards them to different services. The Lambda is a serverless computing service, which is able to run codes to interact with different AWS services.
After logging into the console of Lambda, we need to create a new lambda function. Pay attention to choosing python as the runtime language.
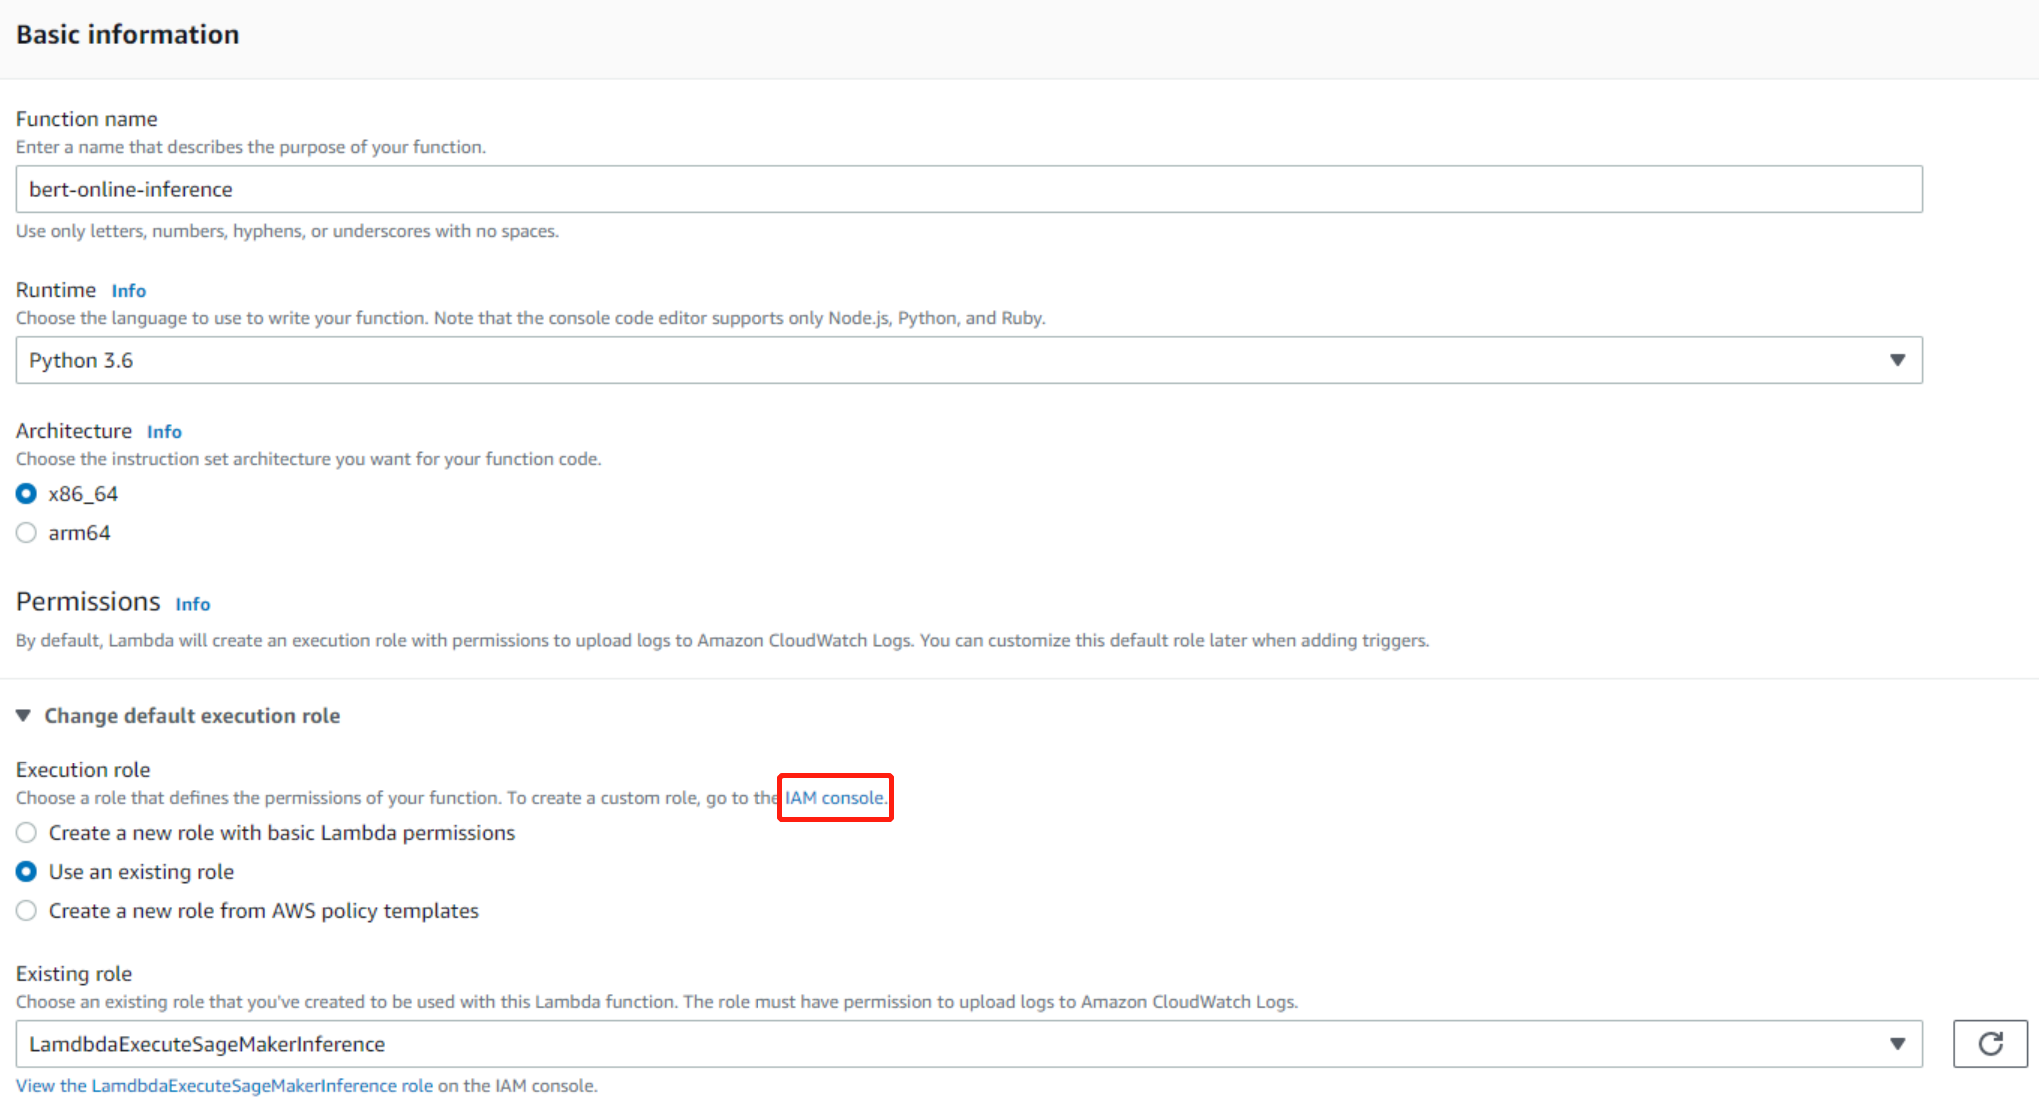
One problem here is that we need to specify the IAM role to enable our Lambda function to access the SageMaker endpoint. Choose one role which includes the following policy. If you can not find any existing SageMaker related roles, you may need to create one yourself by clicking the link to IAM Console. Don’t create a new role with basic Lambda permissions.
|
|
IAM Role Creation
First, choose the use case of Lambda.
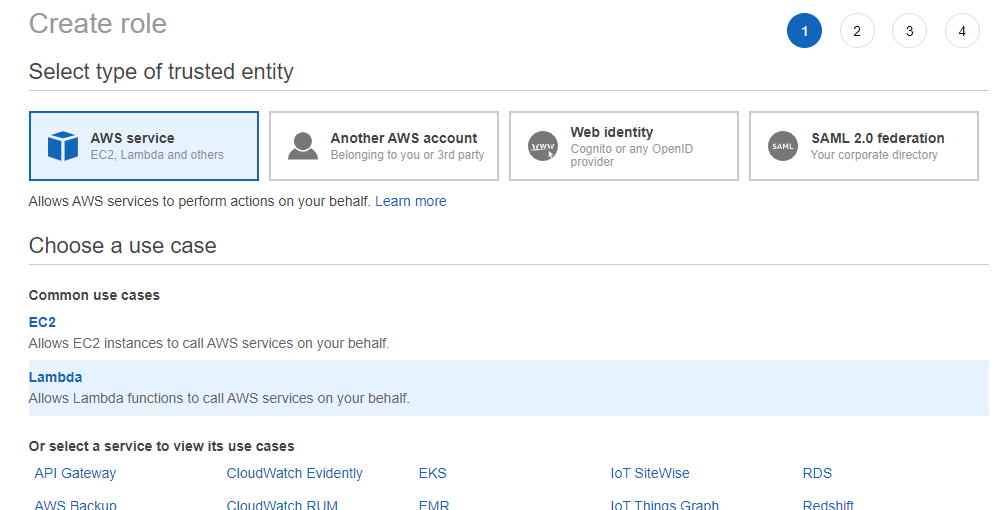
Then, before creating roles, we need to create corresponding policy:
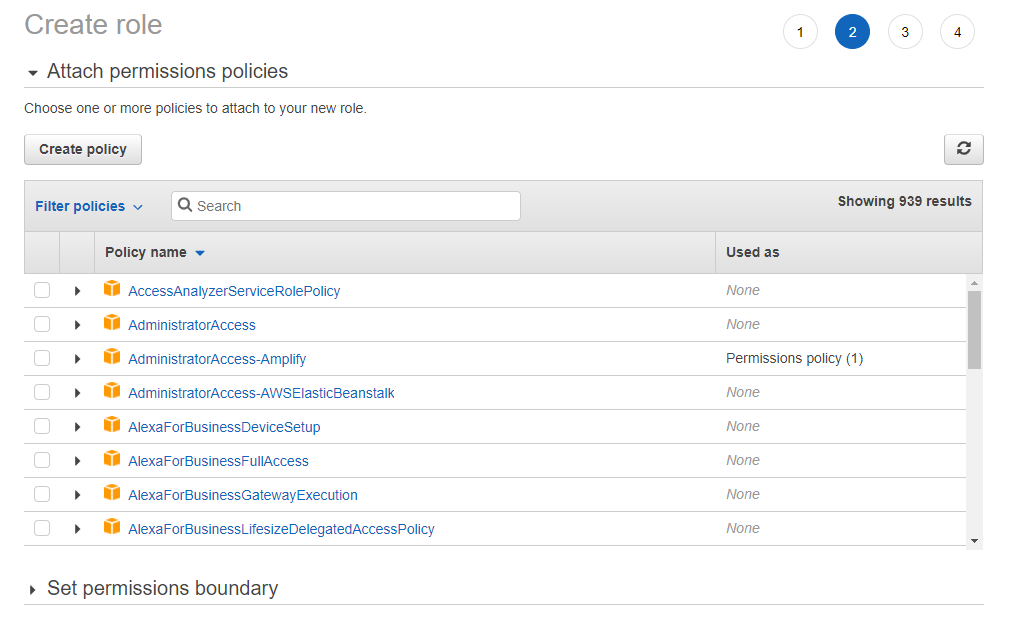
Copy and paste the policy that allows Lambda to invoke SageMaker endpoints.
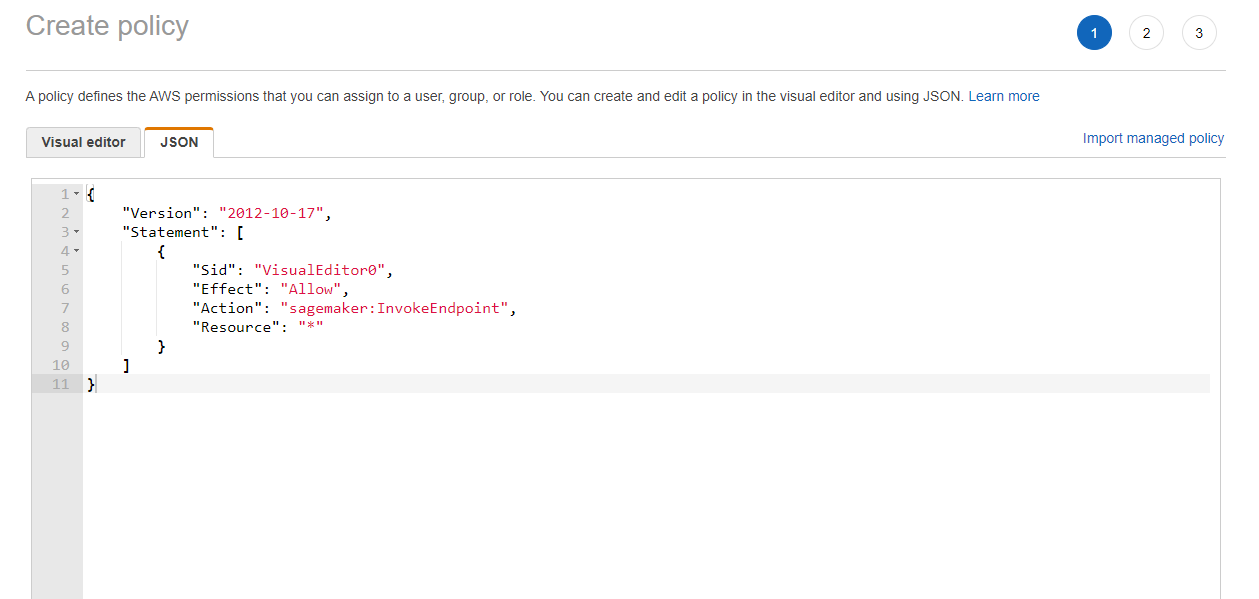
Good job! Next we just need to create a new role with this new policy.
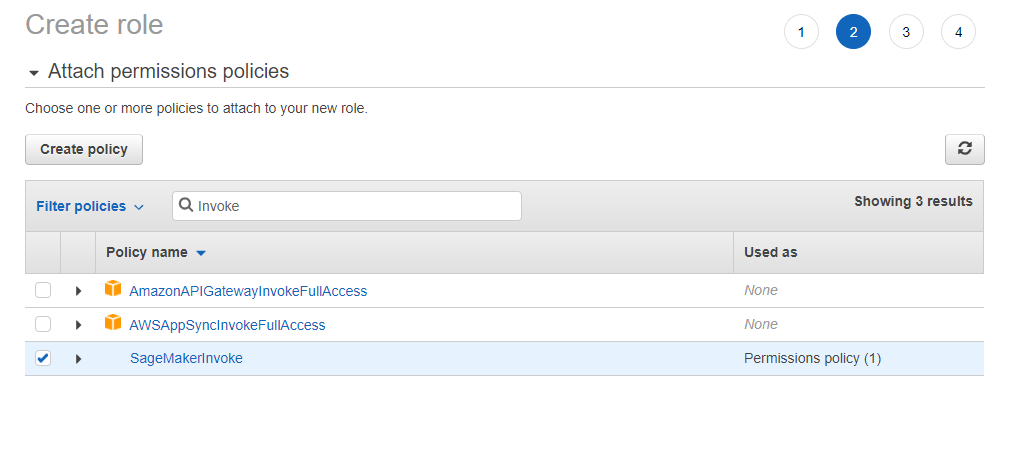
Now we get a valid IAM role for our task. This is the role you should choose when creating a new Lambda function.
On Lambda, we only need to use the code similar to which we used for testing:
|
|
Here we use an environment variable ENDPOINT_NAME. This is defined in Configuration -> Environment variables. We use the environment variable because we won’t need to change the code when switching to a new SageMaker endpoint.

You can do a lot of things inside the lambda function, such as numpy array manipulation, putting the response to DynamoDB or send SNS to notify yourself whenever an abnormal behavior occurs.
Create a REST API - API Gateway
Typically, when handling HTTP requests, we would route the request to different endpoints according to the method (GET/POST/PUT/…) and headers. Because we only accept request with input data, the method is expected to be POST.
Enter the console of API Gateway and click “create API” and choose “REST API”.
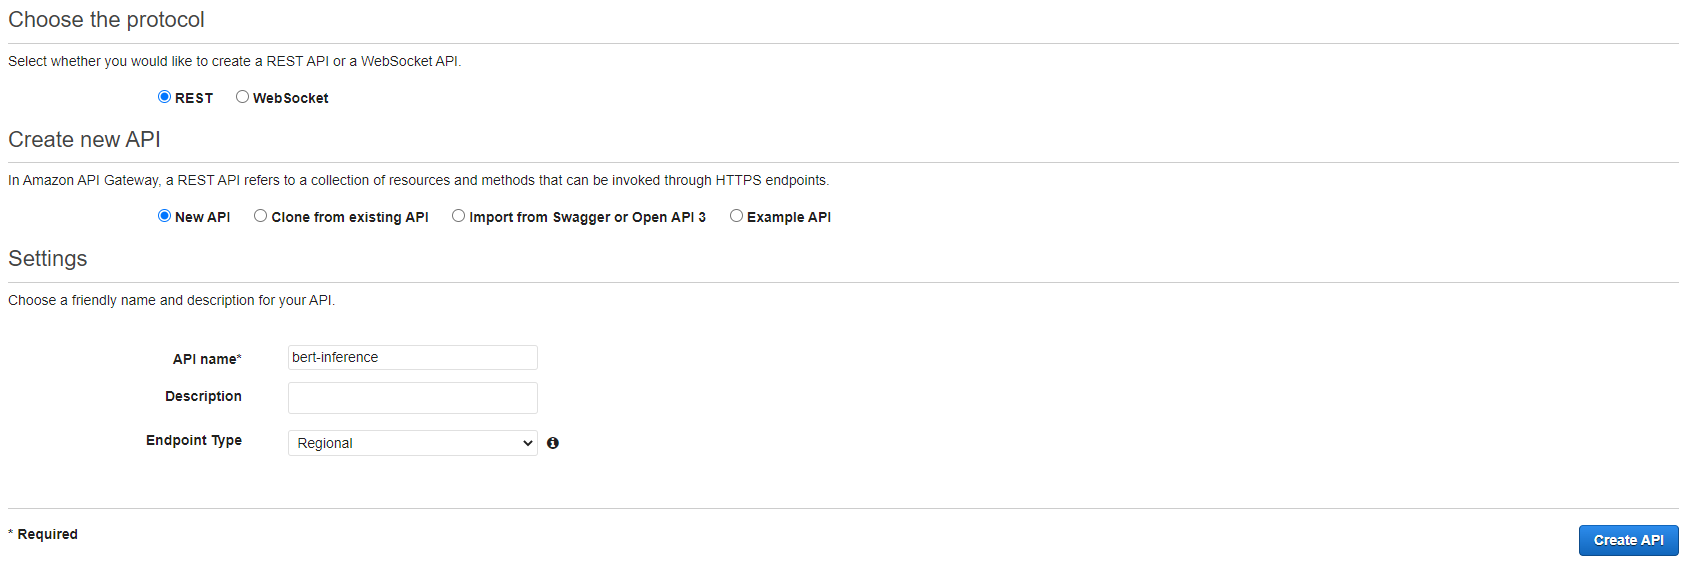
After getting our new API, click Actions -> Create Method -> choose “POST”.
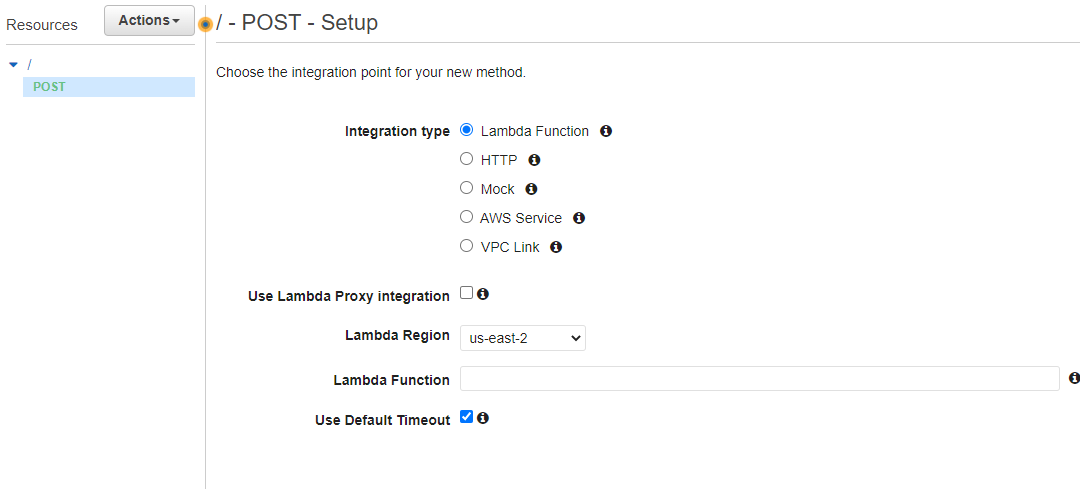
Set up the “POST” method to invoke your previously implemented Lambda function. Then you can test the method with your test data as you like.
Now, select your “POST” method and click Actions -> Deploy API -> New Stage, to deploy your API. After this, you will be able to find the URL of the API in Stages
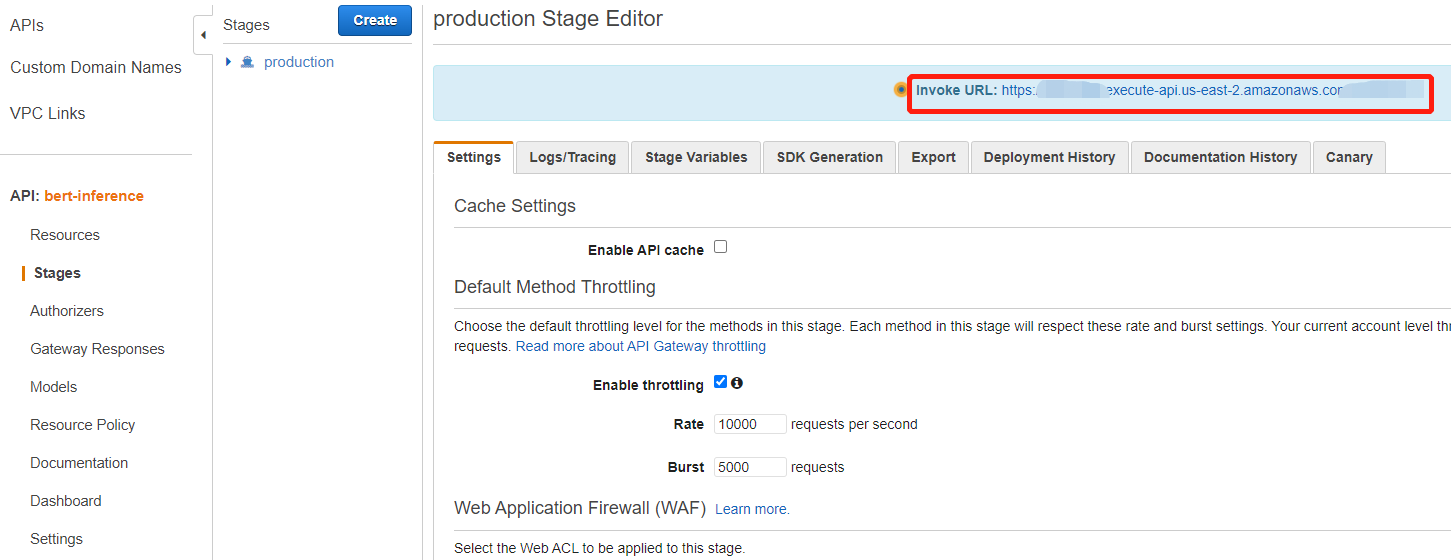
Finally, we can use the requests package to send requests to our REST API. An example is like:
|
|
Of course, you can choose any other language to send HTTP requests to the API.
In the end, AWS is such a powerful platform and there is much to explore in SageMaker and Lambda. I hope my experience in building this API will help you learn better how these services work.